

Tools and Materials Needed

Image 2: All the requirements mentioned in this section laid out on a white backdrop
Before you start, gather everything you’ll need to make the job smooth and efficient:
-
Tools: Wrench, screwdriver and possibly pliers
-
Materials: Replacement jockey wheel, grease for lubrication
-
Safety gear: Gloves and safety glasses to protect your hands and eyes
Having everything ready beforehand saves time and ensures a seamless process.
Step-by-Step Replacement Process
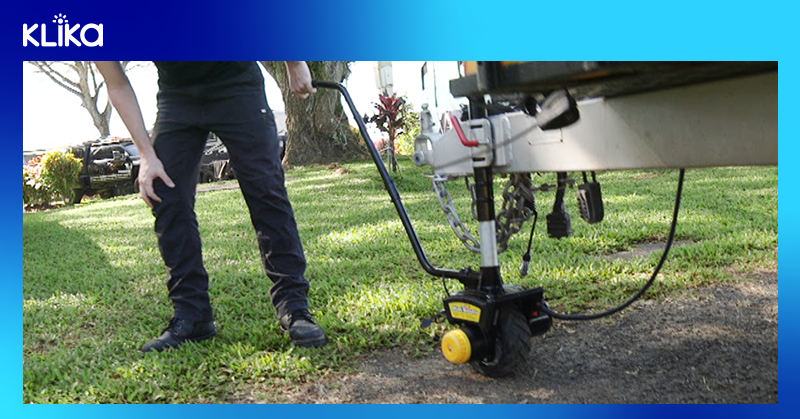
Step 1: Prepare the Trailer
Start by ensuring your trailer is on a flat, stable surface to prevent any movement during the replacement. If your trailer is attached to a towing vehicle, disconnect it for better access and safety.
Step 2: Remove the Old Jockey Wheel
Grab your wrench or pliers and loosen the bolts, pins or clamps holding the old jockey wheel in place. Once the fastenings are removed, carefully slide the old wheel assembly off. Take a moment to inspect the bracket for rust or damage before proceeding.
Step 3: Install the New Jockey Wheel
Position the new jockey wheel in the mounting bracket, aligning it properly with the holes or slots. Secure it using the provided bolts, clips or pins, making sure everything is tightened firmly. Avoid overtightening, as this could cause difficulty in operation later on.
Step 4: Test the Ratchet Mechanism
Once the new wheel is installed, give the handle a few turns to test the ratchet mechanism. The wheel should move smoothly and lock securely when needed. If it sticks or feels loose, make necessary adjustments to ensure proper alignment and operation.
Step 5: Lubricate and Final Check
Apply grease to the moving parts, such as the ratchet handle and wheel axle. This will ensure smooth operation and protect against rust. Lastly, double-check all bolts, pins and clips to confirm they’re secure. A quick once-over now saves you from future headaches.
Pro Tips for Maintenance
-
Keep it clean: Dirt and grime can clog the mechanism, so clean your jockey wheel regularly.
-
Lubricate often: A little grease goes a long way in preventing wear and rust.
-
Inspect before trips: Check for loose bolts or unusual wear before hitting the road.
-
Avoid overloading: Stay within the wheel’s weight capacity to extend its lifespan.
Conclusion
Replacing a faulty jockey wheel isn’t just about convenience—it’s essential for safe and smooth trailer operation. With the right tools, a bit of patience and regular maintenance, you’ll make towing and parking easier and stress-free.
Need a replacement jockey wheel? Explore Klika’s range of durable options, delivered fast to your door!